Saturday, August 08, 2026

New Model Mandolin: 8

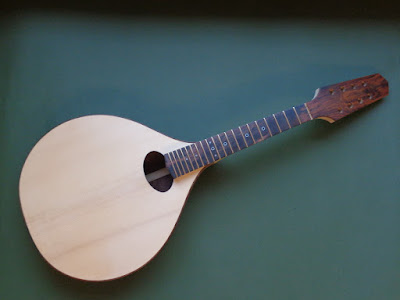
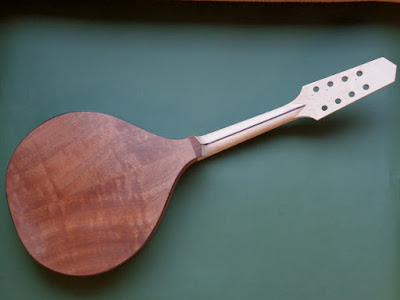
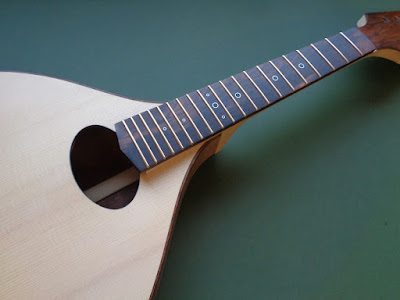
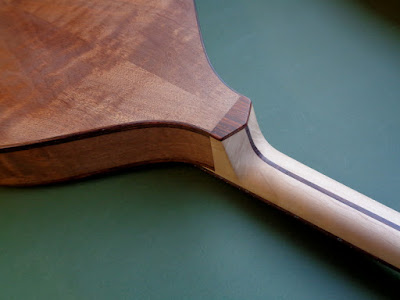
 My "New Model" mandolin (as I'm currently calling it) has now been completed. I'm incredibly happy with the final outcome and looking forward to building the next one! Here is the last video in the series and below that a whole batch of photos for you.

Cheers Gary

Labels: , , , , ,

Saturday, July 04, 2026

New Model Mandolin: 7

Well, this is another long video but so, so much to get through!

The bridge is made and I have brief chat about its design, the strings go on and I show you how I set-up my mandolins. And finally……..the New Model Mandolin gets to sing its first notes!

So, cuppa at the ready and off we go.

Cheers Gary


Labels: , , ,

Tuesday, March 03, 2026

Nava Electric Mandolin Part 5: Completed!


The electric mandolin (e-mando) is now complete! In this video, I give a “guided tour” of the instrument and a demonstration of how the pick-up system works.

And a few photos below.........


Hope you like it!

Cheers Gary

Labels: , ,

Tuesday, September 12, 2023

Nava Electric Mandolin now complete


As you can see above, the latest e-mando has now been completed and is looking (sounding and playing) rather lovely, if I say so myself! Photos below, thanks for looking.


Labels: , , , ,

Tuesday, January 17, 2023

Standard Mandolin XV: sneak preview!

The latest Standard mandolin is well underway. The body is together: English walnut back and sides with an Adirondack spruce soundboard. The fretboard and bridge are going to be made from bog oak. The pieces of bog oak that I’ve sourced are from a specialist and you can read its fascinating story on their website.

Hopefully it will be completed and ready for sale this Spring: £925 (including case).

Here’s a bit of a taster………..


Labels: ,

Friday, February 18, 2022

New Standard Mandolin (available soon!)

As you can see, the new Standard mandolin is almost done, the next step is to make the bridge, get it set-up and playing.
I’m very pleased with the mandolin so far. It has a simple, elegance which depends only its form and its materials rather than any unnecessary decoration, everything you see is pure mandolin.
The neck is made from figured maple with my usual carbon fibre inserts. The fretboard, from Brazilian rosewood, has simple circles acting as position markers and my favourite wide evo frets. One new feature that I am trying, is a slightly longer 360mm scale length (+8mm).  

The soundboard is made from Adirondack spruce with stiff Sitka bracing and the sound hole simply bound in black.
It should be complete in a month or so time and will be offered for sale via my web-site. If you wish to register an interest, contact details can be found on my website too.

Labels: , , ,

Monday, July 05, 2021

Archtop #5: Neck Joint


With the mortice section of the neck joint already routed in the body, the next step is to carefully mark-out and cut the tenon on the neck itself. My rule is always to do any adjustment on the neck and leave the mortice well alone as it’s been routed accurately.

After a bit of fettling, the neck is glued in to place and left overnight; gravity does the clamping!
The protruding part of the tenon is then cut-off. It would, of course, be easier to cut it off before the neck is glued on, but that protruding part helps support a straight-edge whilst checking alignment.

After the bindings had been glued on and the body of the mandolin cleaned-up, it was looking quite pretty! However, with my method of building it will now under-go, what I call, an ugly duckling stage. You’ll see what I mean! The beautiful swan shan’t emerge until the neck has been shaped in a few stages time. 
You can also see one of the reasons why I like to leave the neck square and unshaped: it’s far easier to hold the mandolin firmly in a vice whilst doing this work.
Four 6mm dowels then go in to the neck joint to double lock it in place.
The first part of the fretboard support is fitted. As it’s wedged between the top plate and the neck, any possibility of future movement should be eliminated.

Labels:

Sunday, June 20, 2021

Archtop Mandolin #5: Body together

The top and back have been glued on to the rim to create a magic box!

When making flat-top instruments, you can locate the top and back relative to the rim by housing the ends of the braces in the linings, however, as there are no braces on a carved instrument, I use wooden pins to stop the top and back sliding around and to ensure that they are correctly aligned.

Before I glue the back on, I always like to drill the jack socket hole right through the tail block, so that the inner surface of the block doesn’t splinter when the 12mm drill breaks through. So, there is a bit of tricky lining-up to do with the tail-piece and incomplete body.

The holes for the two retaining screws are easy to drill, but I never like trying to locate the centre point of the jack socket hole. This time I had a eureka moment- I put a 4mm washer into the tail-piece’s 12mm hole, which gave me an accurate centre to drill a pilot hole! It’s bizarre how these little tricks make life so much easier and give such great satisfaction when discovered!


With the holes drilled for the tailpiece, the back can be glued on and then the overhanging edges trimmed-off. Behind the mandolin’s body, you can see my “True Channel” router jig which I’m not 100% happy with; more on that later!
And here is my current and preferred method of routing the binding channel on an archtop instrument. This works well because the top and back edges are flat and parallel to the work bench and there’s plenty of clearance between the router and the highest points of the arches.
Ready for purfling and bindings.

Labels:

Saturday, May 01, 2021

Archtop #5; The Rim

 The rim for archtop #5 has been completed; it consists of the walnut sides, which are held together with two blocks, the linings and the end graft which, is purely decorative.

The neck block is laminated from two pieces of sitka with a central piece of walnut; for extra strength, the walnut’s grain runs at 90 degrees to the sitka.  Due to the orientation of the neck block, end grain is exposed, so it’s sealed to reduce any chance of shrinkage.

The tail block again is laminated, this block takes the screws from the tailpiece and will also have a 12mm hole for the endpin jack, so laminations are essential to reduce the likelihood of splitting.

 Over the years I’ve used tentellones, kerfed, reversed kerf and solid linings; they all do the job of increasing the surface area for gluing the top and back on. However, I much prefer solid linings as they add considerable stiffness to the rim. Mine are made up from 2 x 2.5mm layers, individually bent and then glued in place.


With the linings in place, and some structure given to the rim, I mark out and route the mortice for the neck joint. 
And last, but not least is the end graft, visually it’s important to get the proportions of this correct, even though most of this won’t be see as it will be under the tailpiece!


Labels: , ,

Monday, April 19, 2021

Chambered body electric mandolin: COMPLETED!

As the title says, I’ve now finished the latest emando. So, below are some of my favourite photos of it and of course the season finale video! In the video, on a couple of occasions you’ll hear the emando without amplification and it demonstrates how the concept of increasing the natural resonance of the instrument, by building in “chambers” does, in fact, work.

This emando was, by far, the most challenging one that I’ve done, but hopefully you’ll agree that it was worth the effort. Will I make another? Of course! Ideas whirling away in the ol’ brain-box already!

And the video..................

Labels: , ,