Saturday, August 08, 2026

New Model Mandolin: 8

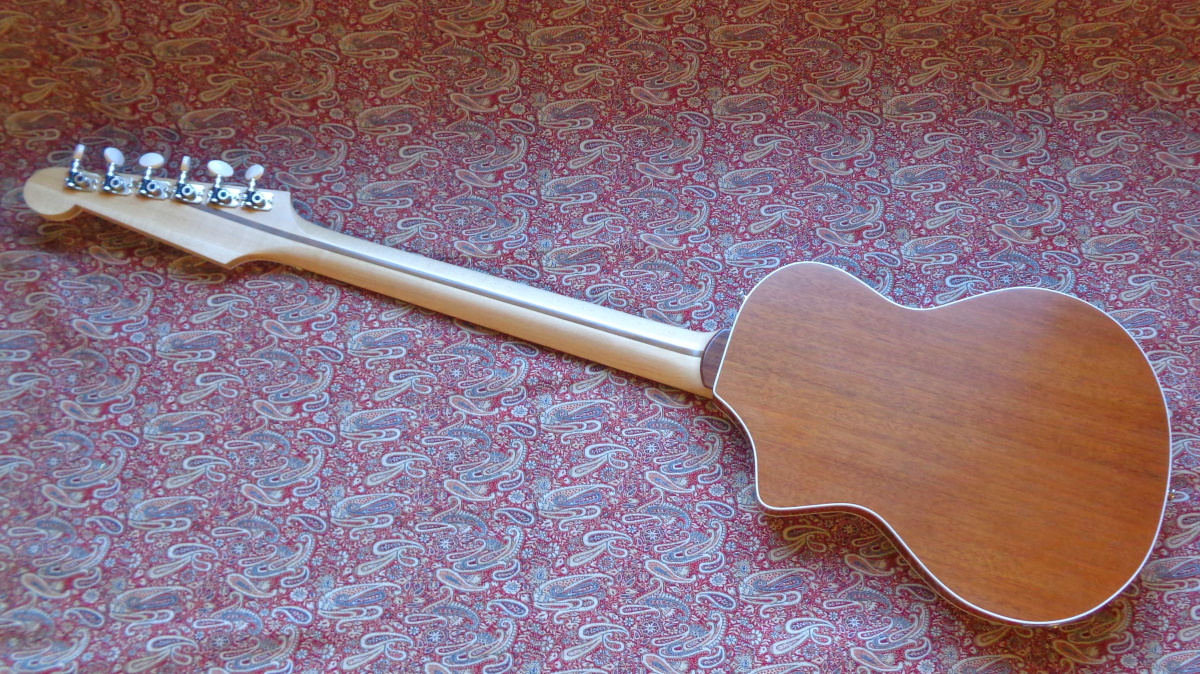
 My "New Model" mandolin (as I'm currently calling it) has now been completed. I'm incredibly happy with the final outcome and looking forward to building the next one! Here is the last video in the series and below that a whole batch of photos for you.

Cheers Gary

Labels: , , , , ,

Sunday, May 03, 2026

New Model Mandolin: 4

The body of the mandolin is now together, so what’s next? In this video, I look at routing the rebate for the purflings and bindings. The purflings take quite a while to fit as there are tricky mitres to cut and the bindings (made from walnut) need to be bent on the bending iron to fit exactly. All good fun! Oh, and a bit about the fretboard too!

Cheers Gary


Labels: , ,

Tuesday, September 12, 2023

Nava Electric Mandolin now complete


As you can see above, the latest e-mando has now been completed and is looking (sounding and playing) rather lovely, if I say so myself! Photos below, thanks for looking.


Labels: , , , ,

Saturday, December 17, 2022

Guyatone LG50 Project: 14 The Final Chapter

Both the original LG50 and my version of it are now complete. In the latest video you can get an idea of what they sound like. If you’re interest in owning one or both of these instruments, there are many details about them, photos pricing etc on the FOR SALE page of my website. Also I've written a bit of an essay on the whole project.

Below are some photos, I’ve alternated Guyatone/Nava-Tone, so that you can compare the two.

Cheers Gary!

Labels: , , , , ,

Monday, August 15, 2022

Shaping the Navatone neck

Throughout the building of my LG50 replica, there’s been a real tension between my desire to make a faithful copy of the original and the need to keep true to my ideals as a luthier. This has resulted in some tweaks and sensible modifications, such as using a two-way adjustable truss rod or binding the fragile edge of the back. I like to feel that any changes that I’ve made would have been approved of by Mr. Matsuki! When it came to carving the neck, after much thought, I decided that I had to give it a “vintage” profile in keeping with the original Guyatone; essentially a deep vee shape. And that’s what I do in the latest video.

Labels: , , ,

Tuesday, July 26, 2022

Guyatone Project Part 7

To be honest, when I first saw the Guyatone up for auction, I thought it would be a quick flip, but as time has gone by, it has become more of a passion project. At the start of 2022, I thought that I’d be making some more mandolins and had in mind designing an oval hole archtop, never never never would I have imagined that I would be restoring an old Japanese electric guitar let alone be building a replica of it! As it happens, I’m really enjoying the work: the challenges it has thrown up, new techniques that I’ve had to learn, researching an aspect of guitar history previously unknown to me and in the process making some great new contacts.

So, in this latest video, I’m working on the neck of my “LG50”. One of the challenges was always going to be binding the head: watch the video and see how I tackled it.


Labels: ,

Monday, May 02, 2022

Guyatone LG50 update

The Guyatone project is progressing well. In the latest video, you can see how the carbon-fibre reinforcement strips were fitted in to the neck.

I have been searching t’interweb for information and various parts. I found this photo of an old Bell Musical Instrument Shop catalogue from the 60’s. 

Bell were a music shop based in Surbiton, just south of London; I can remember having one of their catalogues when I was a lad and drooling over WEM amplifiers and Watkins guitars. The LG50 in this one, must be later than mine as the pick guard is larger (and would have covered the holes I mentioned in the first video?) and is made from pearloid. Interestingly the price is £25, around £800 to 900 today.

Unfortunately, the original tuners aren’t usable but I managed to source some very suitable replacements from Project Guitar Parts; coincidently these are sold as replacements for Watkins guitars.


I also found these period correct knobs:  one thing that I really like is that they’re off-white so match the pick-guard. So many repro parts are cream in colour and that would be too dark for this guitar.
Although I’m not a great fan off relic or distressed components, I decided that the strap button that I wanted to use was just too shiny to blend in with the tailpiece and had to have a bit of work done to it!
So far, so good!

Labels: , ,

Tuesday, June 29, 2021

Archtop Mandolin #5: Purfling, Binding

So, the purflings and bindings slowly go on, layer by layer……..

Until!

Labels: , ,

Saturday, May 01, 2021

Archtop #5; The Rim

 The rim for archtop #5 has been completed; it consists of the walnut sides, which are held together with two blocks, the linings and the end graft which, is purely decorative.

The neck block is laminated from two pieces of sitka with a central piece of walnut; for extra strength, the walnut’s grain runs at 90 degrees to the sitka.  Due to the orientation of the neck block, end grain is exposed, so it’s sealed to reduce any chance of shrinkage.

The tail block again is laminated, this block takes the screws from the tailpiece and will also have a 12mm hole for the endpin jack, so laminations are essential to reduce the likelihood of splitting.

 Over the years I’ve used tentellones, kerfed, reversed kerf and solid linings; they all do the job of increasing the surface area for gluing the top and back on. However, I much prefer solid linings as they add considerable stiffness to the rim. Mine are made up from 2 x 2.5mm layers, individually bent and then glued in place.


With the linings in place, and some structure given to the rim, I mark out and route the mortice for the neck joint. 
And last, but not least is the end graft, visually it’s important to get the proportions of this correct, even though most of this won’t be see as it will be under the tailpiece!


Labels: , ,

Saturday, April 10, 2021

Some thoughts on craftsmanship and the lone luthier.

Back in 2009 I wrote a blog post, “So you want to be a luthier?” At the time I was getting quite a number of enquiries from would-be luthiers, so the post seemed appropriate and I think what I said then, is still relevant.

12 years on and I’d like to share my thoughts on working as luthier/craftsman (on his own) who, wishes to make the best possible instruments that he can.

Using the word craftsmanship implies a level of quality that a product (in my case a fretted instrument) has. The better the craftsmanship displayed, the better the product. However, from the perspective of the craftsman, I would suggest that the word craftsmanship isn’t just about the end product, it’s a state of mind, a continuous striving for improvement- more of a journey than a destination; something that the Japanese call Kodawari. But, what does it take to be a craftsman?

There is no denying that natural ability, talent or whatever you wish to call it, comes into play when you are trying to learn and eventually master a skill. With practise, perseverance and sheer bloody-mindedness you can attain a certain level of achievement, but you need that x-factor of natural ability to excel in your chosen area.

What are those talents needed for craftsmanship? Well in my opinion; manual dexterity, hand-eye coordination, the ability to visualise an object in three dimensions, a certain aesthetic appreciation, problem solving skills and, I’m sure, there are more attributes that I’m unable to articulate.

But of course, how many people do we know who have wasted their talents? Raw talent is not enough, you still need practise, perseverance and sheer bloody-mindedness to reach a high level of craftsmanship!

It’s often said that you need 10,000 hours of practise to master a skill; I think I’d agree with that. I’d equate it this way- say it takes on average 100 hours to build a guitar/mandolin by hand, build 100 instruments and there’s your 10,000 hours and I’d hope that you would have reached a high level of expertise by then. These days, the internet might allow you to skip hours of your own instruments’ design development, by allowing you to piggy-back on someone else’s experience, in how-to, YouTube videos. But, what you don’t get is the experience of handling hundreds of different pieces of wood and learning, empirically, their characteristics. Or gain the muscle memory of using tools, bending sides, the feel of applying polish with a pad etc. That’s where serving your time comes into play.

I was fortunate enough to attend the London College of Furniture back in the late 1970’s and literally everything was done by hand. I built 13 guitars whilst I was there; each piece of wood was thicknessed by hand plane and cabinet scraper, rebates for the purfling and binding were cut with a self-made purfling cutter and chisel etc. It wasn’t until my 54th guitar that I invested in a thickness sander for working on backs and sides!

If you are starting out now, there’s an abundance of specialist tools and jigs available, pre-shaped parts, and CNC machinery. Unless you’re determined to work with hand tools the experience that you gain will be very different and consequently, you will develop a very different skill set.

Once you can master the tools and techniques of your trade, the next step to being the best craftsman you can, is about your mental attitude towards your work. Is this too a natural aptitude or sheer bloody-mindedness and discipline? I don’t know.

If you finish a task by saying something like, “that’s good enough” or “that’ll do” then it’s implicit that the standard that you’re accepting is less than you are capable of. Maybe there is a pressure of time or labour cost, maybe you’re just bored with that particular task but whatever the reason, is that how you want your work to be? If you finish that task by saying something like, “I don’t think that I could have done that any better” then you are on the road to improving the quality of your work.  And you should also remember any lessons learnt, so that the next time you do that task, the result can be even better. That way you get closer to the unrealistic ideal of perfection.

Of course, mistakes will happen, the important thing is how those mistakes are dealt with; is the part remade, repaired or lived with to demonstrate the hand of the maker? Wood is very unforgiving and I think one the hardest parts of being a luthier is trying to work to near-engineering tolerances in a material that can twist, warp, split, expand and shrink, have wild, unpredictable grain, whilst using tools that depend on our hands to control them. Turning a piece of steel to a close tolerance on a lathe is a very different task to carving a curly maple neck with a spokeshave or rasp.

In order to achieve work of the highest standard, concentration is essential, you must be fully focused on the task; be in what is known as a flow state. For many years I worked with the radio on, or a CD playing in the background, but these days I generally prefer to work in silence, without any outside influences; just me and my work. If you habitually use social media to continually post images of your work or have your phone by your bench, then the ability to focus, uninterrupted, for the necessary period of time that it takes to complete a task, must be diminished.

When evaluating your work, you have to be honest with yourself; look hard at what you’re doing and be super critical. Kind souls will spare your feelings and tell you how good you are, but only you will know if your work is acceptable and gives you pride and happiness. And I use the word acceptable, deliberately because ultimately no matter how good the outcome, if you are a true craftsman, you will be thinking of the next instrument and how it can be better.

Following from that you must be willing to work without recognition or acclaim; the satisfaction coming from the pleasure of producing good work, not the praise of others. Financial reward cannot be a motivator, as the time that you need to spend perfecting the smallest of details would price your work out of the market.

One of the challenges of building guitars or mandolins is that apart from trying to make a beautiful object, you have to build something that functions. It must be comfortable and easy to play and, of course, sound good too. These properties may be subjective but they are paramount to the success of an instrument (and ultimately the luthier). It can be argued of course, that a well-built, well-crafted (and well-designed!) instrument will sound and play well, but the function of the instrument mustn’t get lost in the pursuit of its visual appeal.  

Another challenge is applying the finish. Making the instrument needs woodworking skills, but once it’s built, it needs a finish applied and that finish must be of an equally high quality. I know some makers farm out their finishing to another specialist craftsman. And there’s the rub, if you’re a lone luthier like me, who wants to do everything yourself on an instrument, you need to develop a parallel set of skills in wood finishing and become an expert in that craft as well.

Do you need to be creative to be a craftsman? It’s fair to assume that if you make things, you must have some creativity in you. However, an incredibly skilled craftsman may be part of a large company, using his skills to fabricate or repair a part designed by someone else or perform a single task to an extraordinary high-level on a production line. Equally, they may follow in a tradition and make artefacts that have been well-developed over time and do not require any design input or they may make replicas of classics designs. Their high level of skill cannot be denied but are they creative? I think that a creative craftsman is one who designs and develops the object that he makes, and that is the category that I feel the lone luthier should fall into.

That said, it is hard to maintain those aims, day in, day out without wavering. Doing the best that you can, has to become instinctive and not an approach that you switch on when you feel like it. When you push the envelope, there will, as the wood or your tools reach the limit of what is actually physically achievable, be disappointments. But, hopefully, there will be more highs than lows, as you gain pleasure from a job well done and you find your ikigai.

Labels: ,

Sunday, January 31, 2021

Neck on!

The neck has been fixed to the body on my latest e-mando and it’s all in the video below! It's getting exciting now!

Labels: , ,

Thursday, November 19, 2020

Chambered body, electric mandolin 4- Koa back

I’ve been working on the Koa back, to match the sides that you would have seen in an earlier post. One aspect of making the back, that I knew would be challenging was to cut out the access panel for the electrics. Why? Well, normally on my solid bodies, I route the control cavity and make up a cover from aluminium, brass or whatever. But on this one, as it has a thin back, I thought it be a nice idea to carefully cut-out the opening for the cavity and keep the “waste” to use as a matching cover.  I first saw this idea on those amazing Alembic basses; it’s a feature they call it a “continuous wood backplate". However, lacking sophisticated machinery, I had to use my router, a template and template follower and a 1mm diameter cutter. 


I saw these cutters on eBay awhile back from someone called the Highland Slate Workshop. Now, if you’ve drilled 1mm holes you know that the drill can bend or break quite easily, so it was with some trepidation that I put a 1mm cutter into a plunging router……….

Labels: , ,

Friday, November 06, 2020

French Polishing; The Last Word!

 Here is the last instalment in my quadrilogy of French polishing videos; “Archtop #4 French Polishing pt4: Final, Fine Applications”

I know these have been a protracted series of videos but I wanted to update my previous 10-year-old ones and give those, who are interested, an insight to my current method of polishing.

Cheers Gary

Labels: ,

Thursday, October 15, 2020

Chambered body, electric mandolin

With archtop #4 being polished and Allan’s emando completed, it’s time to start the next instrument! As this will be one of this year’s speculative builds (it will eventually be for sale via my website), I’ve decided to a make a new incarnation of my electric mandolin, this time with a chambered body. I like to feel that my instruments continually evolve and the idea of building an emando with more resonant body appeals, so here we go!

The preferred way of building a chambered body is, start with a solid body blank and remove large volumes of the wood with a forstner bit and router. This approach doesn’t appeal to me, as whenever I make anything, I prefer, where possible, to form it by fabrication i.e. bringing pieces together rather than wasting i.e. the removal of material. Hence this…….(made from Southern Yellow Pine)

And here’s a video to show you how I got this far. There is a lot of work in the construction of this inner core and you’ll appreciate the planning that went in to it. Of course, all of that work will never be seen, but hopefully the difference will be heard; I kinda like that!


Labels: , , , ,

Friday, October 02, 2020

E-mando complete

Here are a few photos of Allan’s electric mandolin which is now complete and happily residing in Scotland!

Labels: , ,