Sunday, February 22, 2015

Mandocello Soundboard Part I

I've just started carving the soundboard for Jonathan’s mandocello and here’s a description of the process so far.
Carved top soundboards come in the shape of chunky wedges and the first thing is to plane one surface of each piece completely flat.
With one flat surface, the join can then be tackled, however before I started to shoot the joint, I cut two slices of the spruce away, to use later as braces.
The join in a carved top soundboard has to be perfect all the way through and it takes a lot of time and skill to achieve this when working solely with hand tools.
Once the joint has been glued, the back surface has to be trued-up and the ‘board taken down to the required thickness and then the shape can be cut out.
Now we look at the profile of the soundboard. After much thought, design and planning, the first wood is removed and this will be a flat area to which the fretboard will eventually be glued.
Then I use the Wagner Safe-T-planner! A tool not for the faint-hearted, but very effective at generating a rebate around the edge of the soundboard. 
The rebate gives you a target to aim for once you start shaping the profile. First I like to work along the centre line and all of the shaping is done with a selection of planes. 
Wood is gradually taken away until the profile fits the template. 
With this profile shaped, I then start working at 90 degrees to the centre line.
More soon……………..

Labels: , , ,

Monday, December 07, 2009

Arch-top braces

You saw in the last post how I did the rosette for Andy’s archtop: the next stage is to fit the bracing. I decided to use X bracing, as I like the idea of the bridge’s feet sitting directly above the braces; this is for two reasons. The first is structural, to spread the load over a larger area, and secondly, I think that the X brace helps to transmit the vibrations from the bridge across the width of the soundboard.
The fitting of the braces on an arch-top is really tricky, as the surface of the brace which is glued to the soundboard, has to twist and turn to follow the contour of the ‘board. A neat little trick is to use a washer (see below). The outside of the washer follows the contour and by resting a pencil on the inside, you can mark a line parallel to the surface. I also used a feeler gauge to test for any gaps.

Once you’ve got the two braces fitting the soundboard’s surface, whole problem is compounded by joining them together to make the X.

Richard’s mandolin
You can also see that Richard’s mandolin is coming along nicely; the English walnut back looks great and once polished it will be a stunner.

Ergonomic guitar II
You may remember my exuberance over how well the 7 string ergonomic guitar worked? Well, I said that I’d make a 6 string version and here is the start........ I’ve laminated maple, mahogany and some veneers to make up the straight thru neck blank and I’ve got some cracking spalted maple that I plan to use on the body. Stefano wanted his guitar to be quite understated in its design: this one is going to be a wee bit fancier! I hope to get this one built early next year and will be offering it up for sale on my website.

Labels: , , , ,

Thursday, November 26, 2009

This week.....

El Corazon
Most of the finishing of El Corazon has now been done. I’m just waiting for the polish to harden before the bridge can be glued on and then the ever-patient Chris will at last get his guitar!


Richard’s mandolin
There has been some more work done on the Richard’s English walnut mandolin which you can see below.

NEVER BUY CHEAP TOOLS! Good quality tools will last a life time and always pay you back. However, here’s an exception; whenever I see these little clamps, at a market etc, I buy them, 6 for £1!! They are really great for gluing linings on, as you can see on Richard's mandolin.


Andy’s arch top
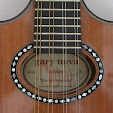
I’ve finally finished shaping the soundboard for Andy’s arch top. It took quite awhile to the get the contours and thickness to what I wanted. The tricky part was the sound-hole and rosette. I made an acrylic template and used a series of template followers on my router to cut the oval sound-hole and rebate for the rosette. I’ve taken the rosette right up to the edge of the hole and bound the inside of it with maple. What potential clients don’t always appreciate is the time taken to do one-off tasks such as this sound-hole; it represents a whole day’s work and the guitar has to be priced accordingly. Fortunately, this is Andy’s 4th instrument from me so I know that he really does appreciate the effort.

I like to effect and will probably do this again on a flat-top. The next test is the bracing.......more on that later.

Labels: , , , , , ,